IT student support at the Technology Assistance Center (TAC)
Reliable tech support for Warrington students
If you are on-campus, you can find our TAC staff at these locations:
Heavener Hall 206: Monday-Friday 7am to 9pm
Hough Hall 237: Saturday and Sunday 7am to 9pm
Phone: 352-273-0248
If you are off-campus and need to submit a help ticket, you will need to connect to the UF VPN to submit a help ticket.
Staff and holiday schedule


January 2026
- 1st – 2nd: closed, New Year’s Day
- 17th – 18th: 8am to 6pm, no classes
- 19th: closed, Martin Luther King
- 31st & Feb 1st: 8am to 6pm, no classes
February
- 8th – 9th: 8am to 6pm, no classes
- 21st – 22nd: 8am to 6pm, no classes
- 28th – Mar 1st: 8am to 6pm, no classes
March
- 1st: 8am to 6pm, no classes
- 14th – 15th: 8am to 6pm, no classes
- 16th – 20th: 8am to 6pm, no classes Spring Break
- 21st – 22nd: 8am to 6pm, no classes
April
- 4th – 5th: 8am to 6pm, no classes
- 11th – 12th: 8am to 6pm, no classes
May
- 2nd – 3rd: 8am to 6pm, no classes
- 4th – 8th: 8am to 6pm, no classes
- 16th – 17th: 8am to 6pm, no classes
- 23rd – 24th: 8am to 6pm, no classes
- 25th: closed, Memorial Day
June
- 6th – 7th: 8am to 6pm, no classes
- 13th – 14th: 8am to 6pm, no classes
- 19th: closed, Juneteenth
- 22nd – 26th: 8am to 6pm, no classes, Summer Break
- 27th – 28th: 8am to 6pm, no classes
July
- 1st – 2nd: 8am to 6pm, no classes
- 3rd – 4th: closed, Independence Day
- 18th – 19th: 8am to 6pm, no classes
August
- 10th – 14th: 8am to 6pm, no classes, Summer Break
- 15th – 16th: 8am to 6pm, no classes
September
- 5th – 6th: 8am to 6pm, no classes
- 7th: closed, Labor Day
- 12th – 13th: 8am to 6pm, no classes
October
- 3rd – 4th: 8am to 6pm, no classes
- 16th: closed, Homecoming
- 17th – 18th: 8am to 6pm, no classes
- 31st – Nov 1st: 8am to 6pm, no classes
November
- 1st: 8am to 6pm, no classes
- 7th – 8th: 8am to 6pm, no classes
- 11th: closed, Veterans Day
- 23rd – 25th: 8am to 6pm, no classes
- 26th – 29th: closed, Thanksgiving
December
- 5th – 6th: 8am to 6pm, no classes
- 14th – 24th: 8am to 6pm, no classes
- 25th – 27th: closed
- 26th – 31st: phone support only from 8:30am to 4:30pm
January 2027
- 1st – 3rd: closed
Computer requirements
Warrington College of Business students must own a computer that meets minimum UF computing requirements and additional system requirements established by the College.
University of Florida requirements
Warrington laptop computer requirements
- Processor: Current generation Intel Core Series (i5, i7, i9) or AMD Ryzen equivalent
- Memory: 16GB RAM
- Storage: 256GB hard drive
- Camera, microphone and speakers
- Wireless internet (WiFi)
- Windows 11 or macOS 13 (Ventura) or newer
- All computers are required to have antivirus software to access the UF Wireless Network. For full UF requirements, go to Eduroam@UF Wireless Onboarding.
Additional recommendations include:
- Purchasing an extended warranty or accidental damage protection.
- Not relying on a tablet, smartphone or Chromebook as a primary device.
If you have a corporate-owned laptop, have your IT department verify you can make changes required by UFIT. You will need administrator rights to install software. If you do not have these rights, we cannot help you.
Supported software specs:
- Microsoft Windows 11: Windows 10, 8, 7, Vista and XP are not fully compatible with our network and therefore are not supported (network access and printing issues).
- Our technicians cannot support foreign language editions of Microsoft Windows.
- macOS 13 (Ventura) or newer: Although older operating systems may work, they also may not be compatible with some programs or the VPN.
- Microsoft Office: Microsoft Office 365 ProPlus can be downloaded per the UF Student agreement with Microsoft.
- Current version of Edge, Firefox or Chrome (freely available).
- Approved antivirus software.
Our technicians do not support foreign language editions of Microsoft Office. The TAC can show you how to use UF Apps for virtualized applications.
Purchasing
If you choose to explore other purchasing options, please pay careful attention to the Warrington computer requirements. Look for comparable features that are included in the Warrington laptops, such as the extended warranty, plus all required software and hardware.
The University of Florida maintains educational pricing agreements with Dell, Lenovo and Apple.

Video lectures
Mediasite is the University of Florida’s platform for viewing your lectures that are available in an online format. You can access your Mediasite course library from the course pages hosted in the e-Learning system.
Common support resources for those students using Mediasite in class.
Graduate printer, scanner and copy access
All Warrington College of Business graduate students are granted access to the study area laser printers (color and black/white). Charges for printing will be applied to each student’s UF financial account. Please read the Printing Services Overview for more details. Students who have difficulty printing to the study area printers should contact the TAC for assistance.
Printing locations
Hough Graduate School of Business students: Hough Hall 220, 330
Fisher School of Accounting students: Gerson Hall 114
Printing charges
Printing rates as of October 2025 are:
- Black & white: $0.07 per page, single-sided; $0.14 for double-sided
- Color: $0.10 per page, single-sided; $0.20 for double-sided
Once per month, the College IT staff will post current student print charges to the UF Financial System for payment. To check your current balance or review print jobs visit the Printing Portal.
To pay for printing charges, navigate to One.UF and view your Campus Finances.
Getting help
Technical questions, please contact the Warrington Technology Assistance Center:
Other notes
- Documents sent to the print queue can be released for printing at any Warrington printer. Swipe your GatorOne ID card at the printer, then select the print job(s) to print.
- If the printer is out of paper, please call the TAC at 352-273-0248.
- When printing, you can select options to staple or 3-hole punch your output.
Students taking our graduate level courses automatically have permissions to our lounge printers. The fee for printing and copying services will be charged to your student account.
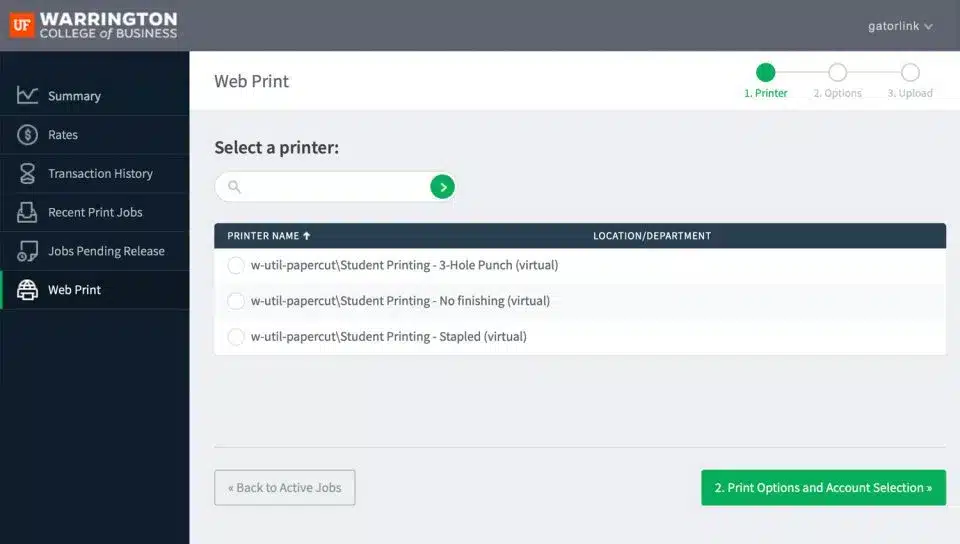
Xerox C8035 AltaLink: User Guide
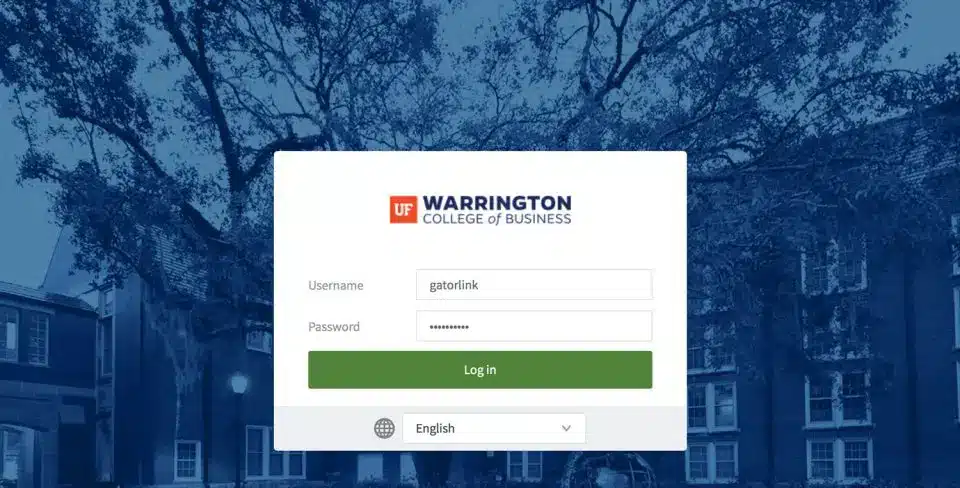
- Login using your GatorLink username and password.
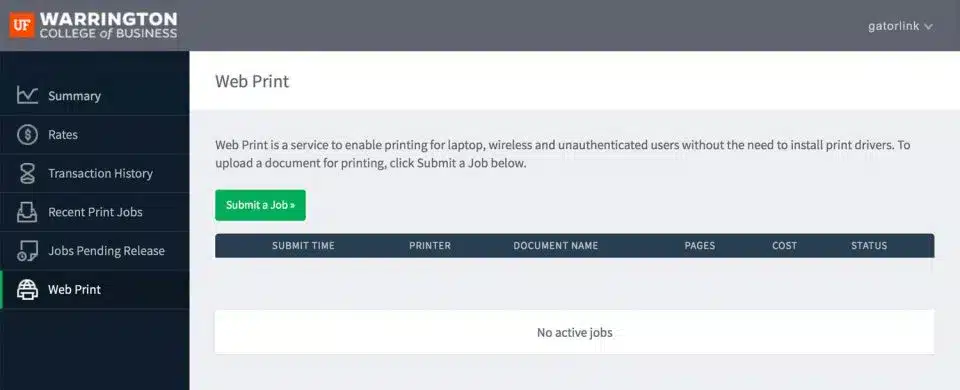
2. Select Submit a Job.
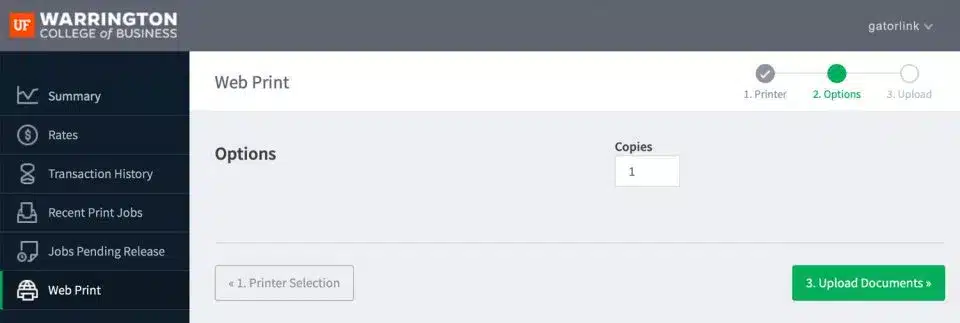
3. Choose what type of finishing you would like: normal, stapled or 3-hole punch. Then click Print Options and Account Selection.
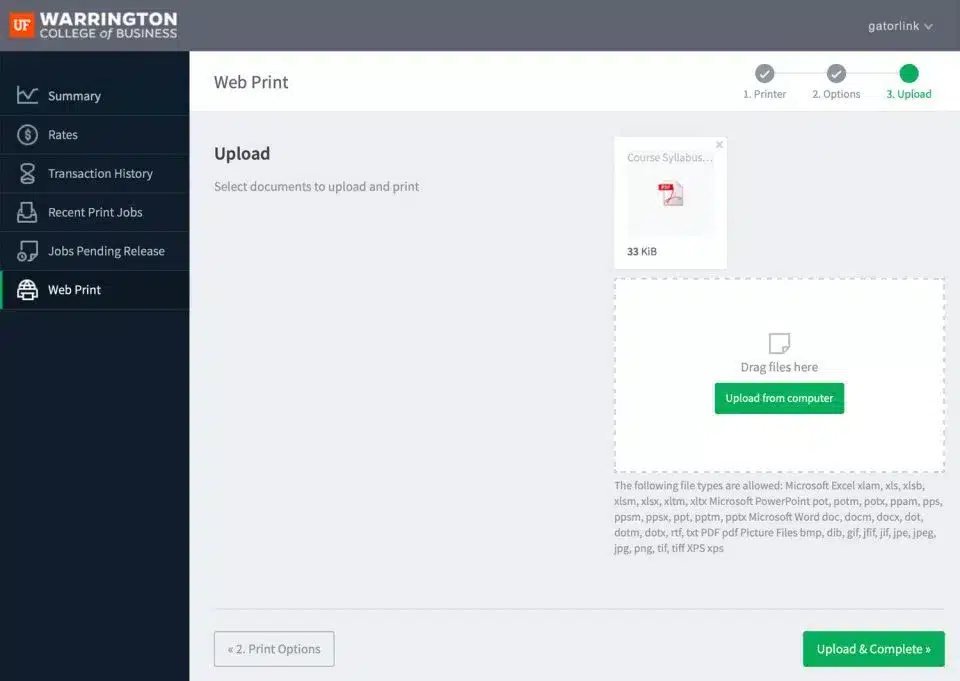
4. Click Upload Documents
5. Upload from your computer and press Upload & Complete.
6. Your job will process.
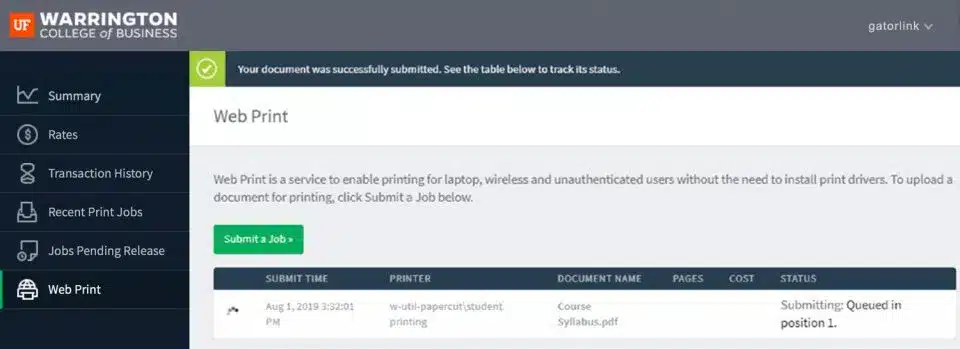
7. Then it will be shown in the holding queue.
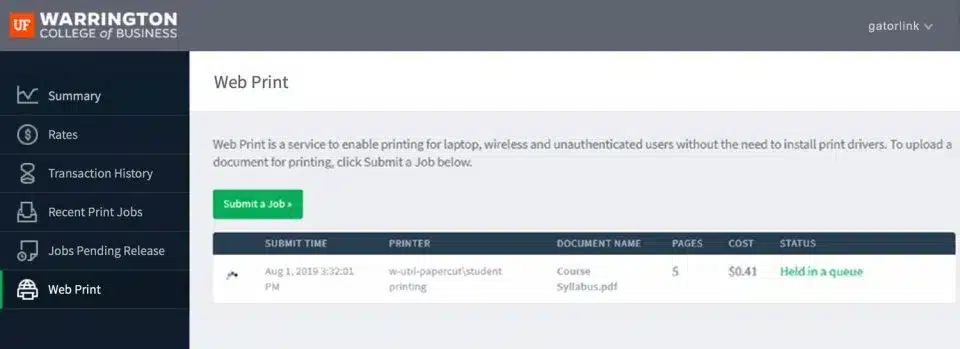
8. This is the view of the LCD screen at the printer After you swipe your Gator1 card with the thinner stripe.
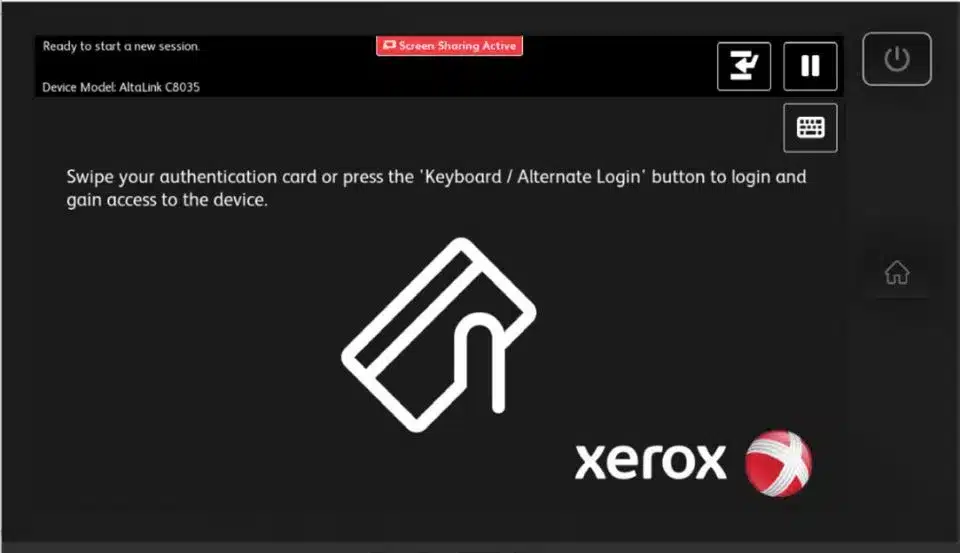
9. It should log you in, and take you to the Print Release page.

10. You will see your pending jobs.
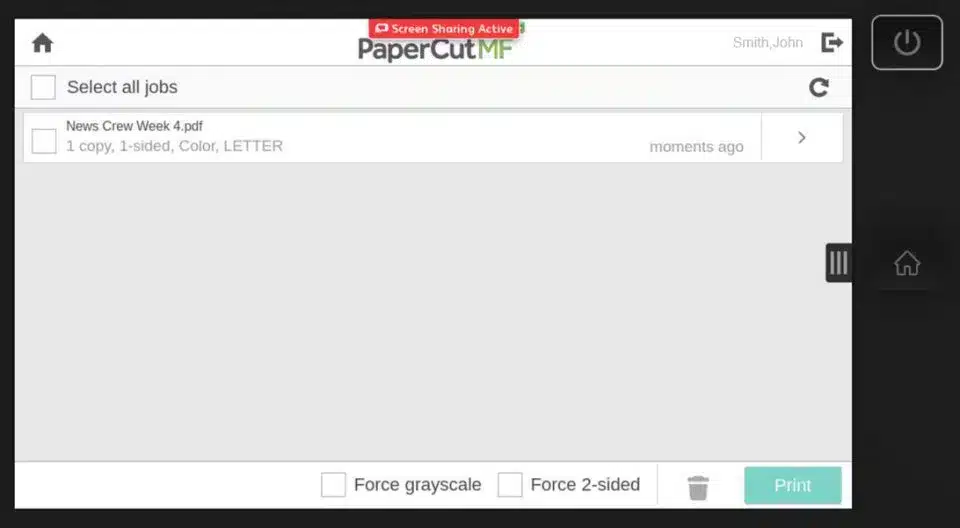
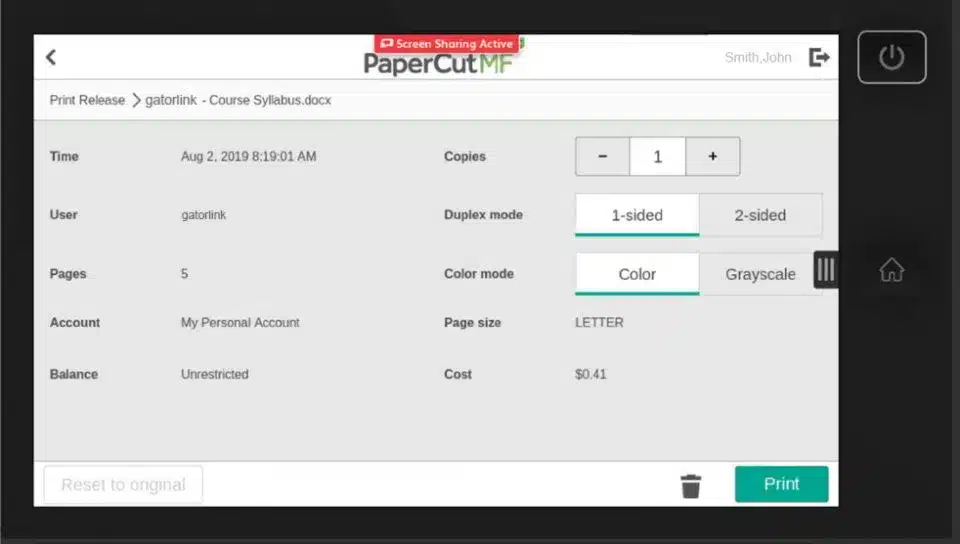
- At this page you can change your job options.
Pressing the “>” symbol next to your print job will allow you to change the properties of the print, such as how many copies, duplexing, and if you want a color print or a grayscale print. The cost of the print will adjust at the bottom to reflect your current selections. Tap “Print” when you want to release your job.
12. The summary page on the website shows you a summary of your print balance, print jobs, and use history.
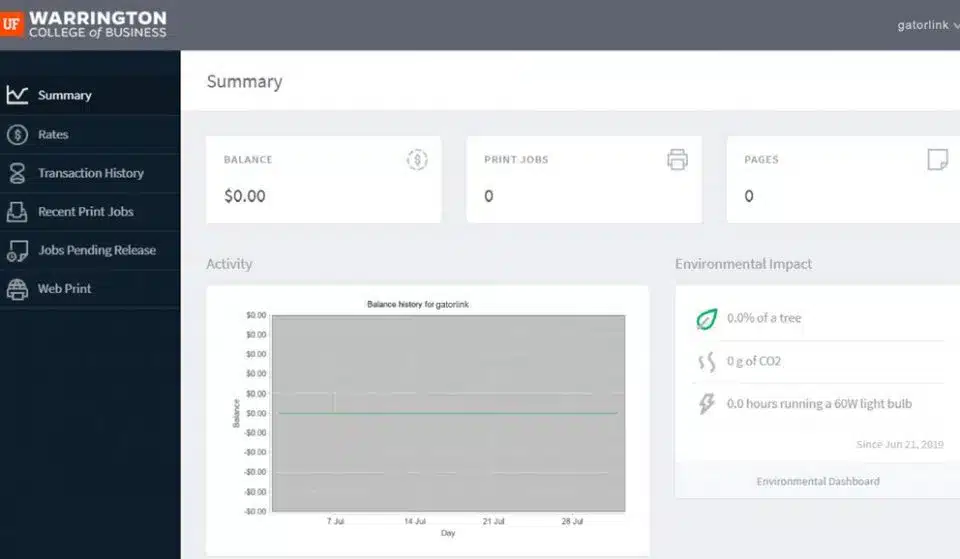
13. Log out.
Scanning is free of charge.
- Swipe your Gator1 card at the printer you wish to use to scan.

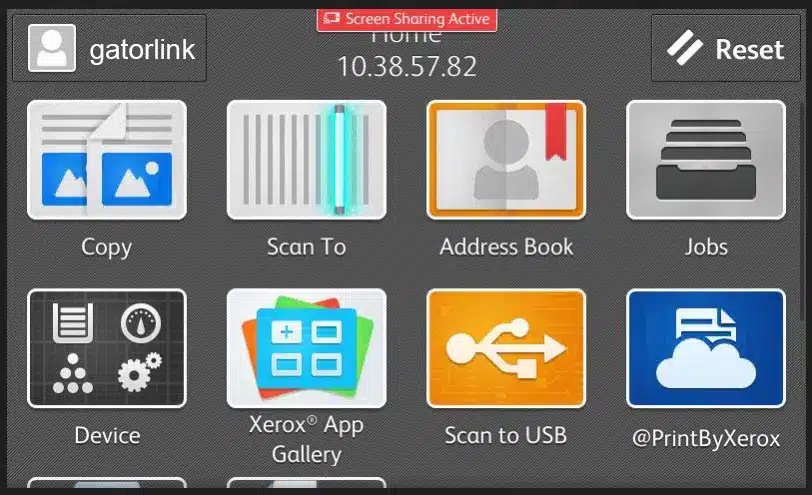
2. Choose Scan.
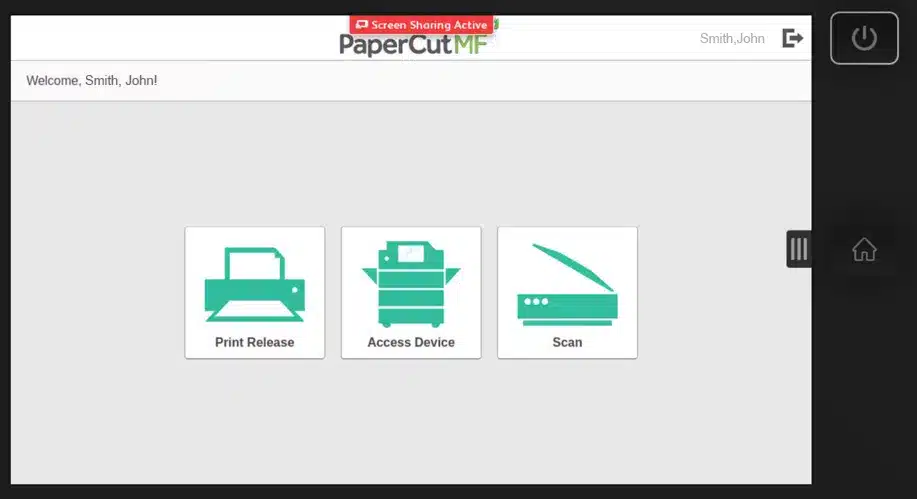
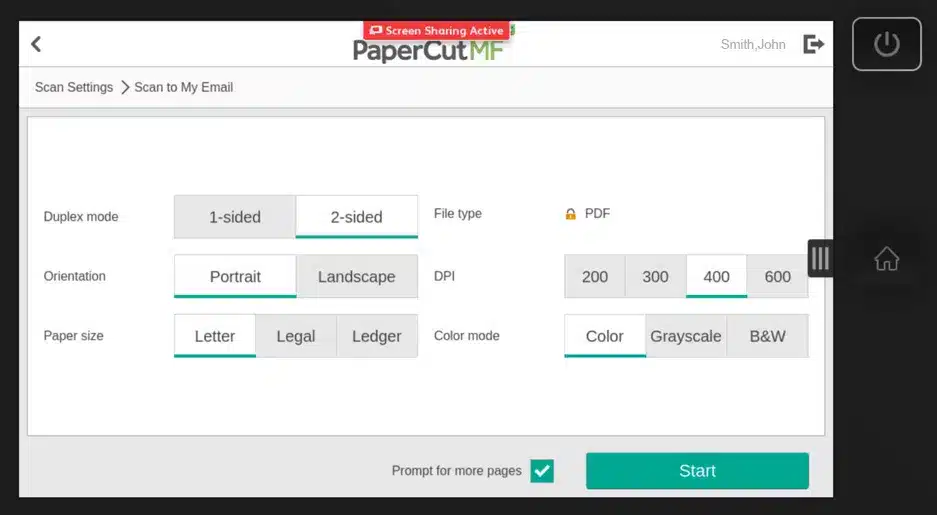
3. You should see the scan to email option. If you wish to change output settings, select Change Setting.
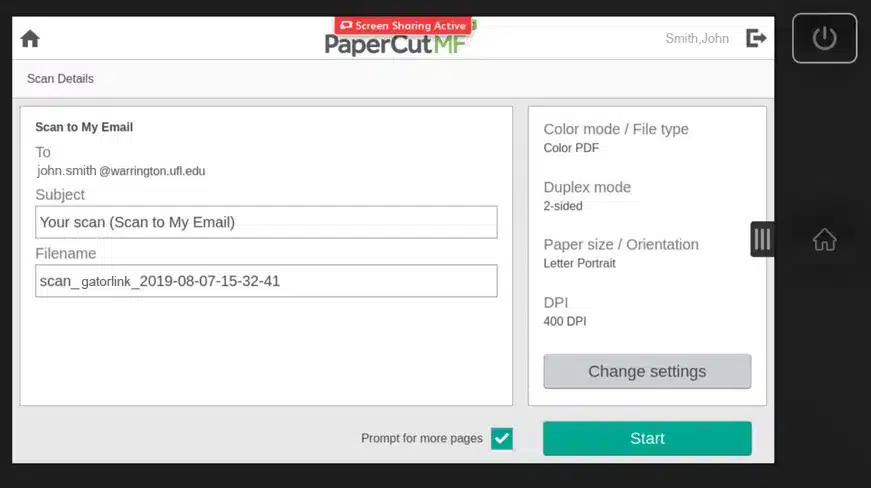
4. Submit the scan and it will send a PDF to your email.
You will be charged the same rate as printing.
- Swipe your Gator1 card at the printer you wish to use to copy.

2. Select Access Device.

3. Choose how many copies you would like made.
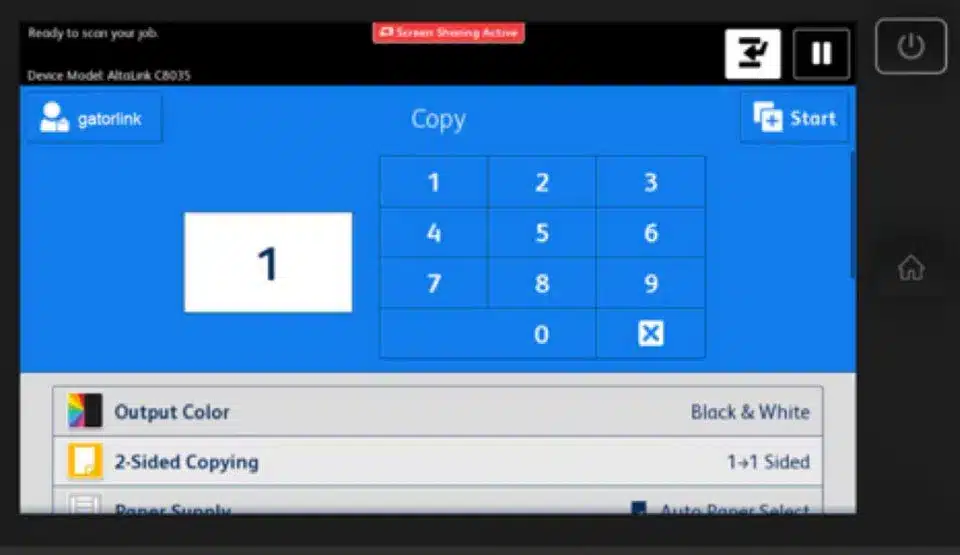
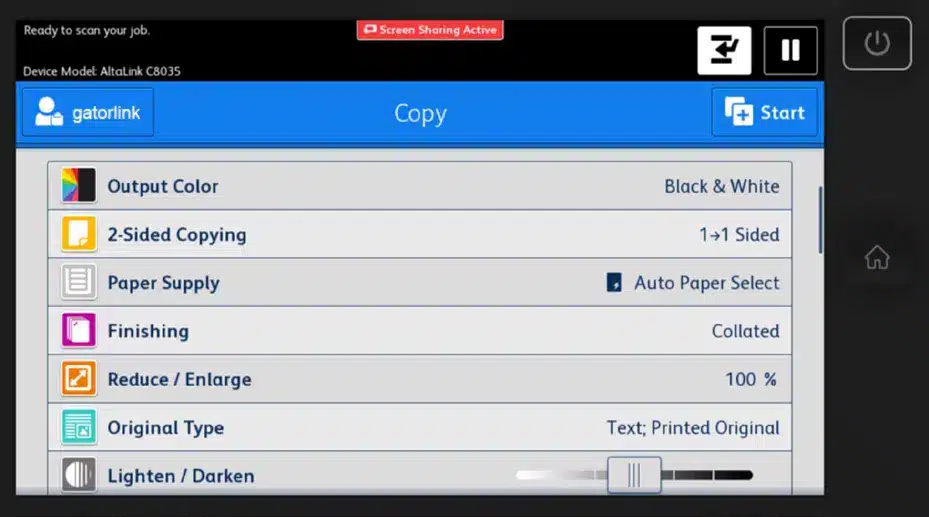
4. Pick your type of copy. Options include color, number of sides and finishing options.
5. To return to the main printing screen, click PaperCut MF.
Students taking our graduate level courses automatically have permissions to our lounge printers. The fee for printing and copying services will be charged to your student account.
Xerox C405 VersaLink: User Guide
- Login using your GatorLink username and password.
2. Select Submit a Job.
3. Choose what type of finishing you would like: No finishing, stapled or 3-hole punch. South Florida Students select No finishing. Select Print Options and Account Selection.
4. Click Upload Documents
5. Upload from your computer and press Upload & Complete.
6. Your job will process.
7. Then it will be shown in the holding queue.
8. This is the view of the LCD screen at the printer After you swipe your Gator1 card with the thinner stripe.
9. It should log you in, and take you to the Print Release page and you will see your pending jobs. Select the job and print.
10. The summary page on the website shows you a summary of your print balance, print jobs, and use history.
11. Log out.
Scanning is free of charge.
- Swipe your Gator1 card at the printer you wish to use to scan.
2. Click Access Device.

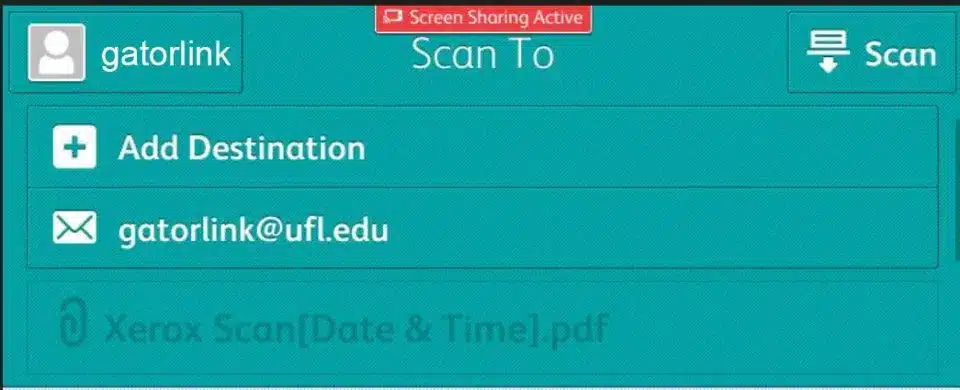
3. Select Scan To.
4. Choose Email.

5. Enter your GatorLink email address.
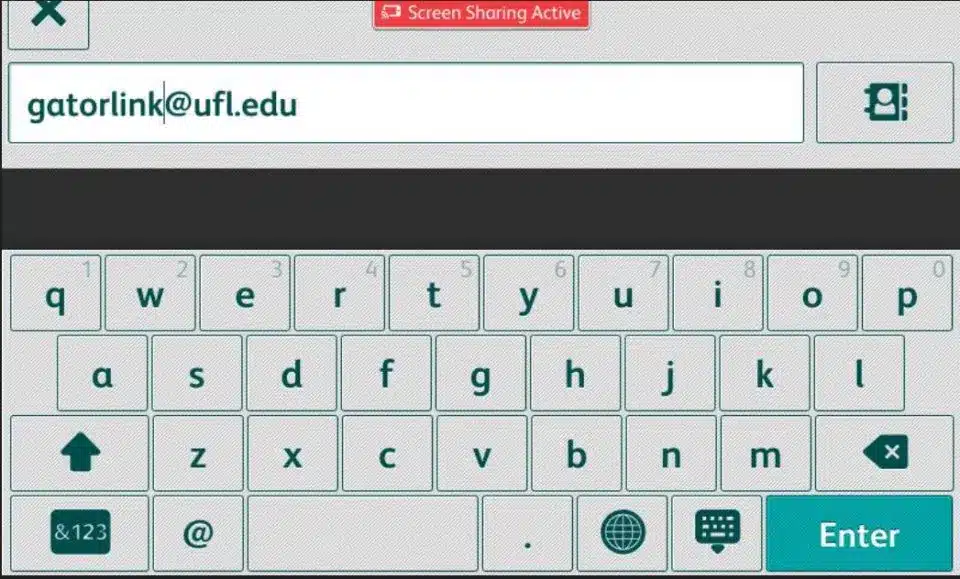
6. Submit the Scan and it will be sent as a PDF to your email.
You will be charged the same rate as printing.
- Swipe your Gator1 card at the printer you wish to use to copy.
2. Select Access Device.
3. Select Copy.
4. Choose the number of copies.
4. Pick your type of copy. Options include color, number of sides and finishing options.
Computer study areas
The College has designated study/work areas for graduate students: Hough Hall 230 and 330 for MBA students, the Heavener hall common areas and study rooms for all non-MBA masters students, and Gerson 114 for Accounting students.
Each room has wireless internet access and high-quality laser printers.
Access to all study areas is via your GatorOne card. Students whose GatorOne cards will not open these doors should contact the TAC for assistance.
E-learning quick tips
Here are some links to Canvas E-learning tips and troubleshooting: